
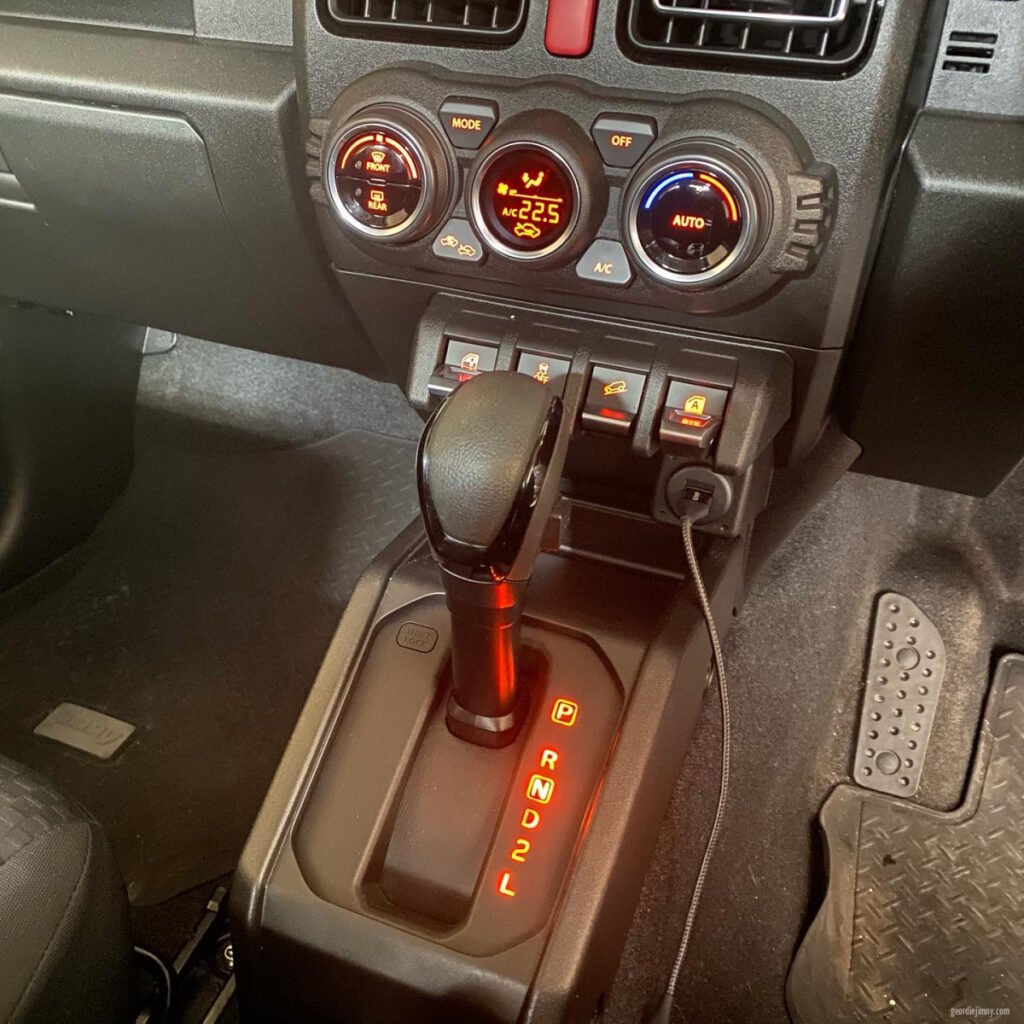
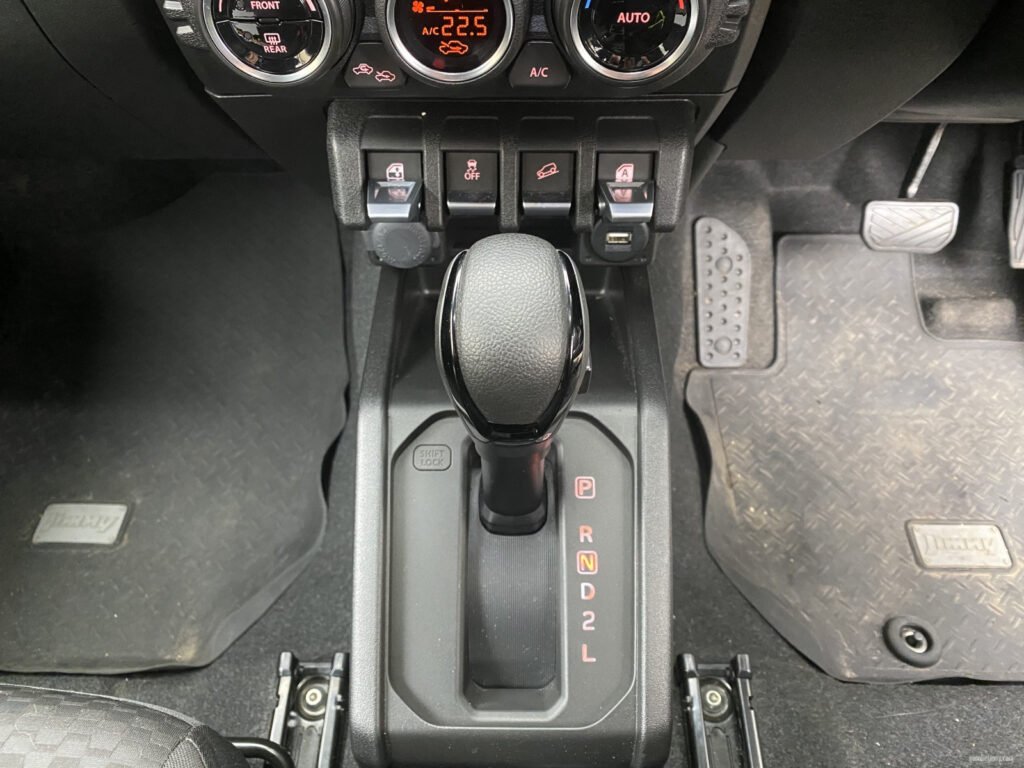
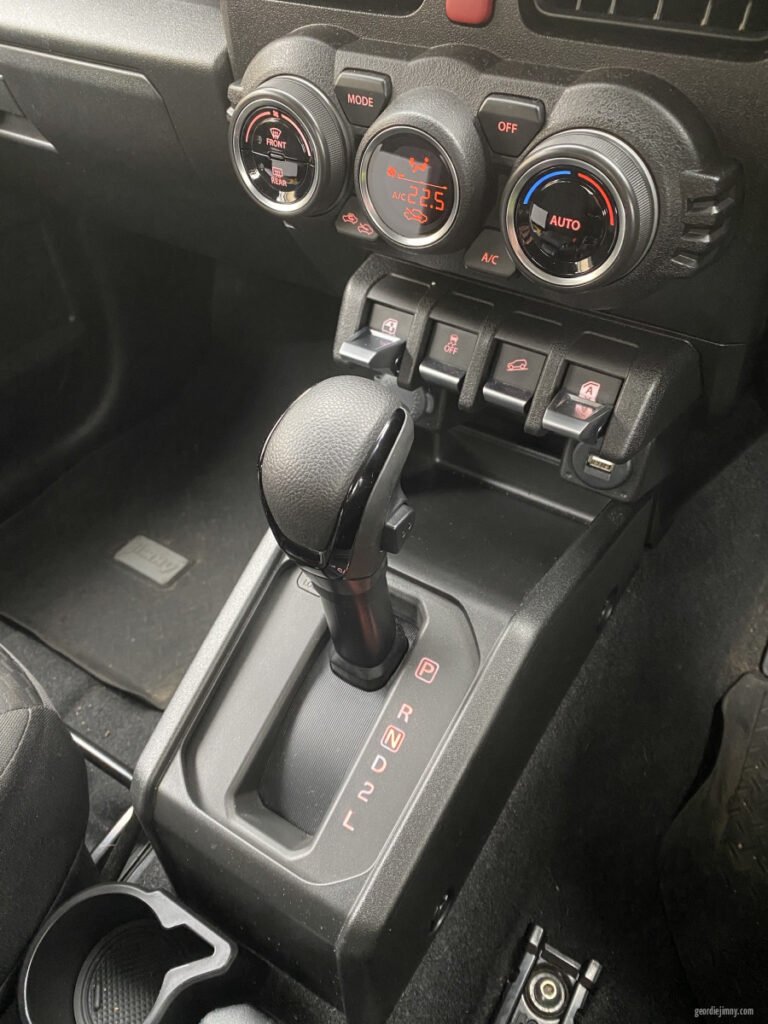
A weird design choice with the new Jimny is the lack of a backlight on the automatic gearbox. When we first bought the car it was the first thing my wife mentioned as an annoying omission.
I saw an Instagram story for the inspiration to do this mod (thanks Flying Fyllis) and immediately hunted down some suitable led strip lights. I then got completely side tracked by dozens of other mods and here we are many months later. I thought I’d give it a go today.
Kit you’ll need
- 10cm LED 12V Strip Light in Cool White (or Amber if you want to match the dash better) – £1.45
- 2 x 100cm lengths of 5 AMP Cable – ~ £3.40
Use whatever you want, I had some already in RED & Black - Mini Blade Add-A-Fuse – £8
- 2 Mini Blade Fuses 5 AMP – £2
- 1 Ring Connector 8mm – £3.90
- 2 Butt Connectors – £1.70
Or whatever else you have lying around to connect the wires up.
Maximum cost = £20.45
You will hopefully have most if these items in your tool boxes, so it could be a super cheap mod.
Fitting
Remove the 4 clips on the gearbox trim, found on all four corners. They simply pop out with a flat head screwdriver or trim removal tool.

You remove the plastic trim box by lifting up and angling it towards the dashboard.
Unclip the trim that has the gear shift position writing on. This part won’t come off entirely so you have to leave it hanging loose.

Remove the trim from the side of the footwell by unscrewing the plastic clip circled in red. It’s easier remove if you pop the end of the door side step up to help pull this trim out.

Remove the curved black trim below the fuse box.

Remove the black cover from the fuse box and set this aside.

Extend the cables on the LED Strip Light with the two 100cm cables. Matching the corresponding coloured cables if you’re a fanny like me.

Then fix the light, face up onto the underside of the gear shift position trim. You want the LED to cover the white plastic. I used duct tape.

Feed the two cables under the trim leading towards the fuse box in the passenger side foot well. You can see the red and black cables on the picture below.

Use some cable ties to secure the cables until you reach the far side of the passenger footwell. I ran my cables along the bottom of the glove box out of sight.
I unhooked the glove box (which is a total pain in the ass) to gain access to behind the dashboard to cable tie the wires easier.
Trim the black cable to allow for enough length to reach the earthing point circled in red below. You can see I ran my cables down the right in the picture below. Attach a ring connector to the black cable then secure it to the earthing point.

Remove the 5 AMP fuse from fuse box in the location shown below in a red box. I used the fuse called IG1 SIG3.

Trim the red cable to allow enough length to reach the fuse box.
Connect the red cable to the red cable of the Mini Blade Add a Fuse.

Insert two 5 AMP fuses into the black connector on the Mini Blade Add a Fuse and push it into the slot where you removed the single 5 AMP fuse. You now have a fused circuit with TWO 5 AMP fuses. See photo below.
Note: The Suzuki fuse you remove will not fit into the Mini Blade Add a Fuse which is why you need to buy two 5 amp fuses that are made to fit whichever circuit extender you purchase.

You will not be able to replace the fuse box cover due to the extender protruding out but you can not see it unless you have your head in the foot well.
Turn on the ignition to test the LED light.
If it’s not working check if something is wrong with the connections on the cables.
Replace the side trim and reattach the black curved bottom trim of the fuse box.
And you’re done!
Result
It looks like a lot of steps but it’s a really easy install with very little chance of things going wrong. It’s harder to write the guide than it is to do the modification. Just be careful removing trim and ideally use plastic trim removal tools to avoid any mishaps.

Hope this helps! Comment below if there’s anything confusing you in the guide. My heads a bit foggy at the moment.
Cheers ?
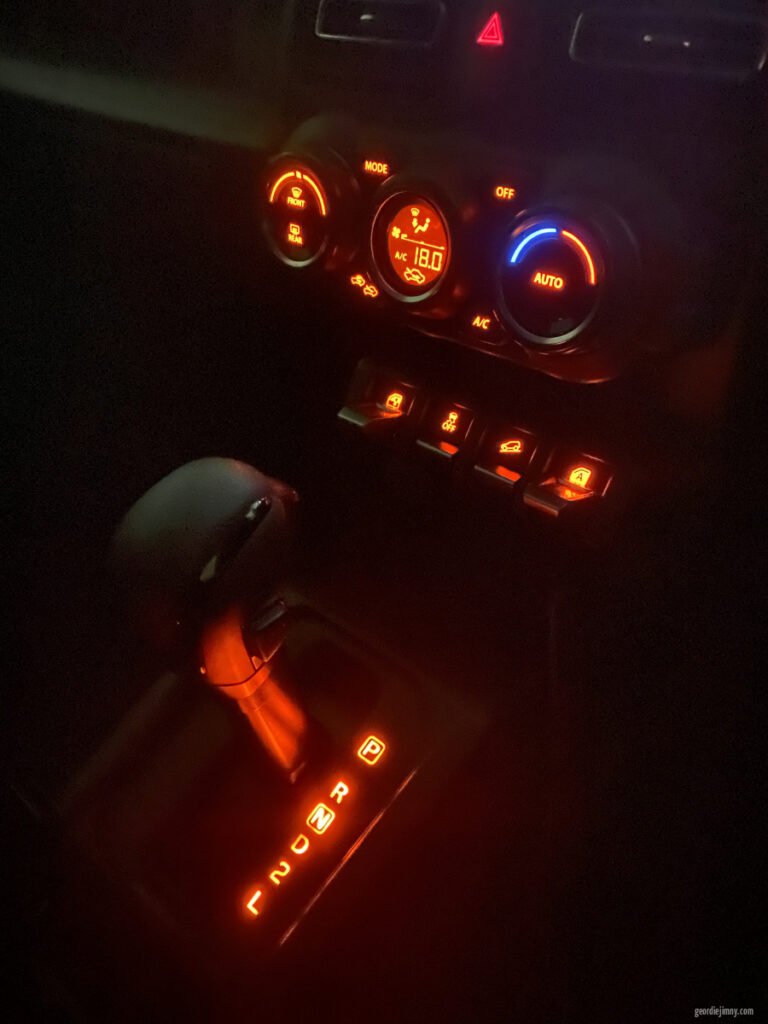
UPDATE:
I’ve changed to the amber colour as the white LED was a bit harsh at night. Here’s what it looks like.
It’s very complicated. The cost is less 3USD
My way is simple.I made this to my Jimny on end 2018.
Remove the main console (4 easy clips)
Remove the shift panel plaque with the letters and keep it over.
At the space under the plaque you will put 10cm /12 leds the adhesive led strip.
ORANGE color (Non Waterproof) 3528 ORANGE led strip 120 led/m (50cm is enough)
https://www.aliexpress.com/item/32968192153.html?spm=2114.13010708.0.0.4da84c4d5QIdpt
Remove the handbrake console and from the one button of the heating seats,find the 2 lighting cables +/-
Use those cables to take power for the led strip (under the carpet to the led strip.)
From the same cables you can take power for lighting the space over the main console.
( 2.5 cm/3 leds of the same led strip )
If you have more Questions ask me .
Stathis Papadopoulos
GREECE
Good idea. Didn’t think of the power from the heated seats.
Not power from Heated seats.
From one of the buttons of the heating seats,find the 2 cables +/- for the light
so when you turn on the car lights you have also lights on the console!!!
yeah a few people have done it that way instead. Makes sense!
How you connect with those lighting cable did you any connectors or just simply peel of and connect to the led strip
Hi I simply taped the LED strip to the underside of the gearbox trim. Connected up the wires using normal connectors to the longer lengths to reach the fuse box and earthing point. I believe some owners have found a live feed in the gear box for the heated seats and an earthing point there too. So you won’t need to run the longer cables like I did.
Hope this helps.
Hi, I tried to do this. I opened up the handbrake casing and saw some wires wrapped up but with my limited electrical knowledge I didn’t know which wire to use. Do you have some photos or a more detailed explanation on the wiring bit?
Many thanks!
Hi, I didn’t wire up to the wires under the centre console. Someone in the comments did but I ran to the fuse box.
Cheers
Paul
Thanks Paul, yea I was hoping Stathis could provide more details on the wiring of the heated seat LEDs.
Hi Geordie, i have an usb port that fit on the switch panel, have a fuse tap, i want you know wich fuse on the box is under key…
Hi mate, I don’t know. I’m not very good with the electrical side of things. Sorry I can’t help.
Thanks
Hi Geordie Thanks dear
🙂
Thanks for the install details.
I did the same but decided that I only wanted the lighting on when the lights are on.
I did some investigation and I decided to tap into the taillight wire to get this to work. I found this on the bottom connector on the forward end of the black box above the fuse box. It’s the yellow wire and it’s towards the top of this bottom connector.
Now it works great, I just used one of those wire joiner clips so you don’t have to cut or strip any wires, and it’s already protected by a fuse.
I also don’t like the bright patches of led strip lighting, so I’ve ordered some orange 12v “glow strip” which will hopefully make it look more genuine.
I hope this helps someone out there.
Cheers and thanks for the instructions.
Nice one Adam, it’s a better idea turning on with the lights ????