
After a small accident in a supermarket car park at the end of 2019 we had a superb excuse to upgrade the front bumper to something more meaty.
Decisions, decisions ?
Many people on instagram said to go for a metal bumper. I can totally see the attraction as there’s some aggressive looking Jimny beasts that have gone that route. Regardless of the grey area on whether it’s road legal here in the UK, a metal bumper is overkill for our build. Adding unnecessary weight on a car that is best kept nimble. Can’t see us ever adding a winch either.
After a lot of research and some advice from my pal in Singapore who had seen the bumper at a car show (and ordered one) I decided to buy the High Bridge 1st front bumper.

The main attributes I like about this design is it looks like a stock bumper, matching the design perfectly and continuing the flow to the fenders. It’s significantly more aggressive than the stock bumper due to the additional height and offers great clearance for bigger tires (maybe later this year). Added to the fact that it comes complete with a skid plate, it ticked all the boxes for what I wanted, a nice balance between an off road style bumper and something that doesn’t look too mad max on a daily driver.
Ordering
I’ll admit I was a bit hesitant to order something direct from Japan. The obvious concerns come to mind, communication issues and what happens if it doesn’t arrive? Thankfully all of my concerns were put to rest after speaking with ENON WHEELS via email. The contact I had has excellent written English and the ordering process went very smooth. 10/10.
The bumper and skid plate originally comes unpainted so you can save some money by doing that yourself, if that’s your preference. You can leave the skid plate its original silver colour for example and spray the bumper any colour you want.
I wanted the bumper painted to match the stock trim and the skid plate painted black and they did that for me for a reasonable additional cost. I sent a PayPal payment to place the order and was sent and invoice to confirm the ETA of 6 weeks… exciting.
Cost
- Front bumper 47,000 JPY, painted semi gloss black to match the trim
- Skid plate 18,000 JPY, painted black
- Shipping 50,000 JPY
TOTAL: 115,000 JPY
(Currency conversion at the time was £850)
My costs were significantly higher due to the expense of shipping. Such as life. In the UK it costs £289.46 inc VAT to replace the original Suzuki bumper. Yes, I know… I could have had it replaced a lot cheaper but that’s boring, right?
Update 20th March 2020.
An import duty/VAT bill arrived from TNT for £176.87. I thought I’d got away with that one ?.
Total cost: £1026.87
Is the bumper worth a grand getting it to the UK? No.
Am I pleased I bought it? Yes. Buy once, cry once as they say.
Update 22nd April 2020.
I’ve found the front and back bumper here https://item.rakuten.co.jp/hb-1st/6474bs006/ direct from High Bridge 1st. You’ll need to likely pay to ship it to a Japanese address supplied by Rakuten then pay again to ship it to the UK. Maybe this works out cheaper than I paid.
Update 16th November 2020.
Jimny style now sell these bumpers. https://jimnystyle.com/collections/bumpers
Delivery
The ETA was 6 weeks and it turned out to be exactly 8 weeks for the bumper to arrive at my door. Impressive, given that there was a national holiday in Japan during this time along with the subsequent shipping delays due to the chaos of the coronavirus.
First impressions
I’ve never bought a bumper before so have no point of reference to compare. It arrived packaged safely in a box that could double as a coffin, it was huge! If I’d had that box as a kid it would have been the best fort ever.
It’s a big chunk of plastic, some bolts, brackets and a big metal plate, exactly what I ordered. One thing I will say is it looks, to my limited knowledge made to a high quality. The finish is pin sharp.
It’s also worth noting that it’s very lightweight, a massive plus point for the Jimny in my opinion.
Installing the bumper
I emailed the guy I placed the order with and he sent me an electronic version of the installation instructions so I could translate them into English. Google Translate wasn’t a perfect translation as you might expect but it gave me enough to go with.
I had no idea how to remove the Suzuki bumper. Can’t be that difficult, surely? Thankfully after some messing around it was pretty easy to do. However, as soon as it was removed it uncovered some hidden damage from the accident that would stall progress of the fitting.
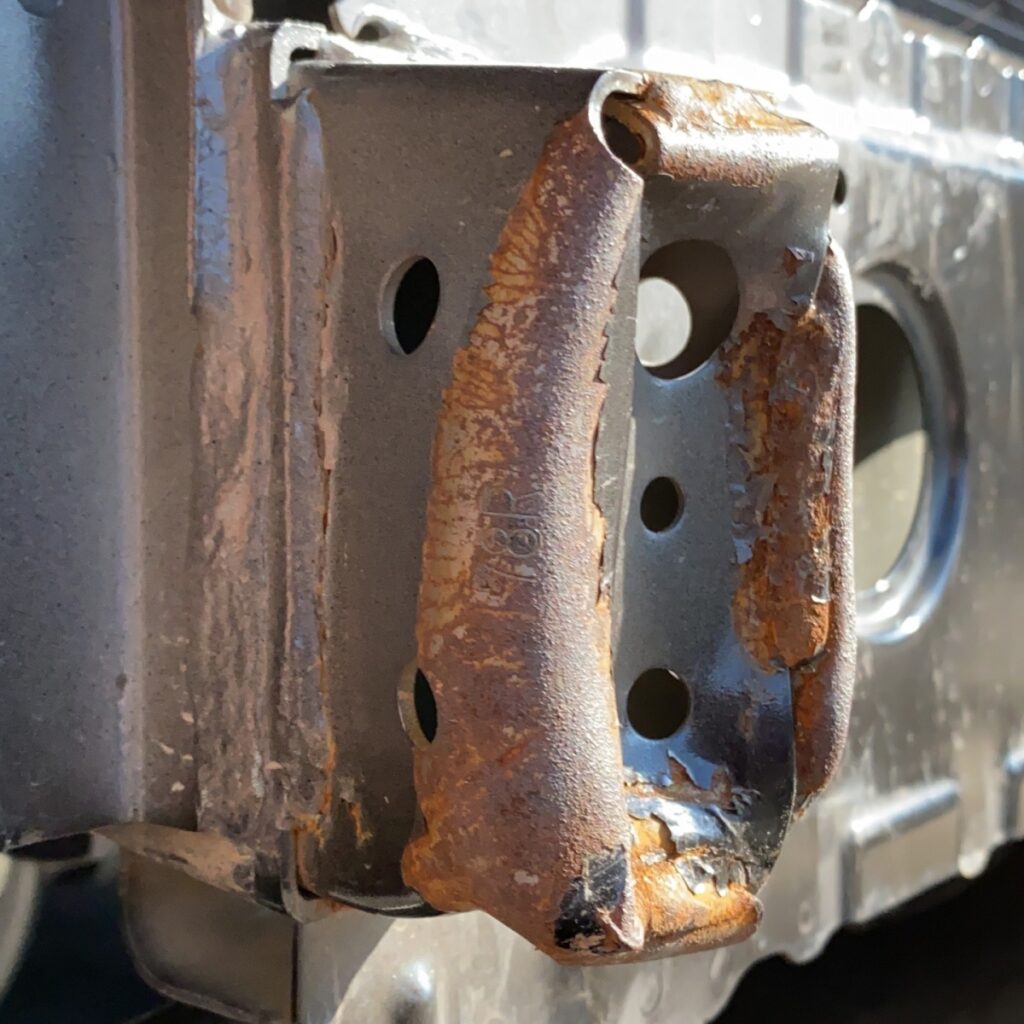

Fixing the damage
Using the word fixing is a stretch but let’s run through what happened.
Firstly I got some advice from friends and a few nice people on Instagram. The advice was to use a slide hammer to try and pull out the damage. I managed to buy one locally the next day but unfortunately it wasn’t up to the job and didn’t budge the damage even 1mm.
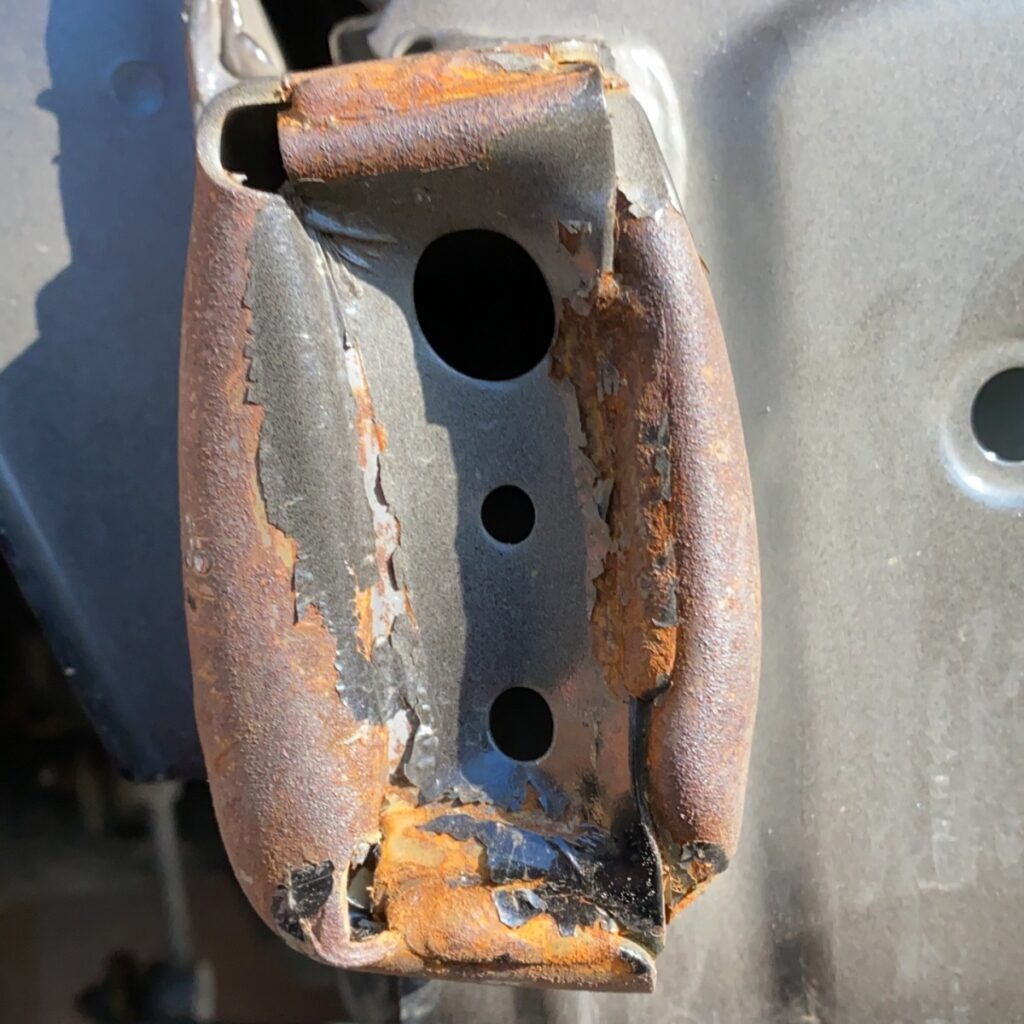
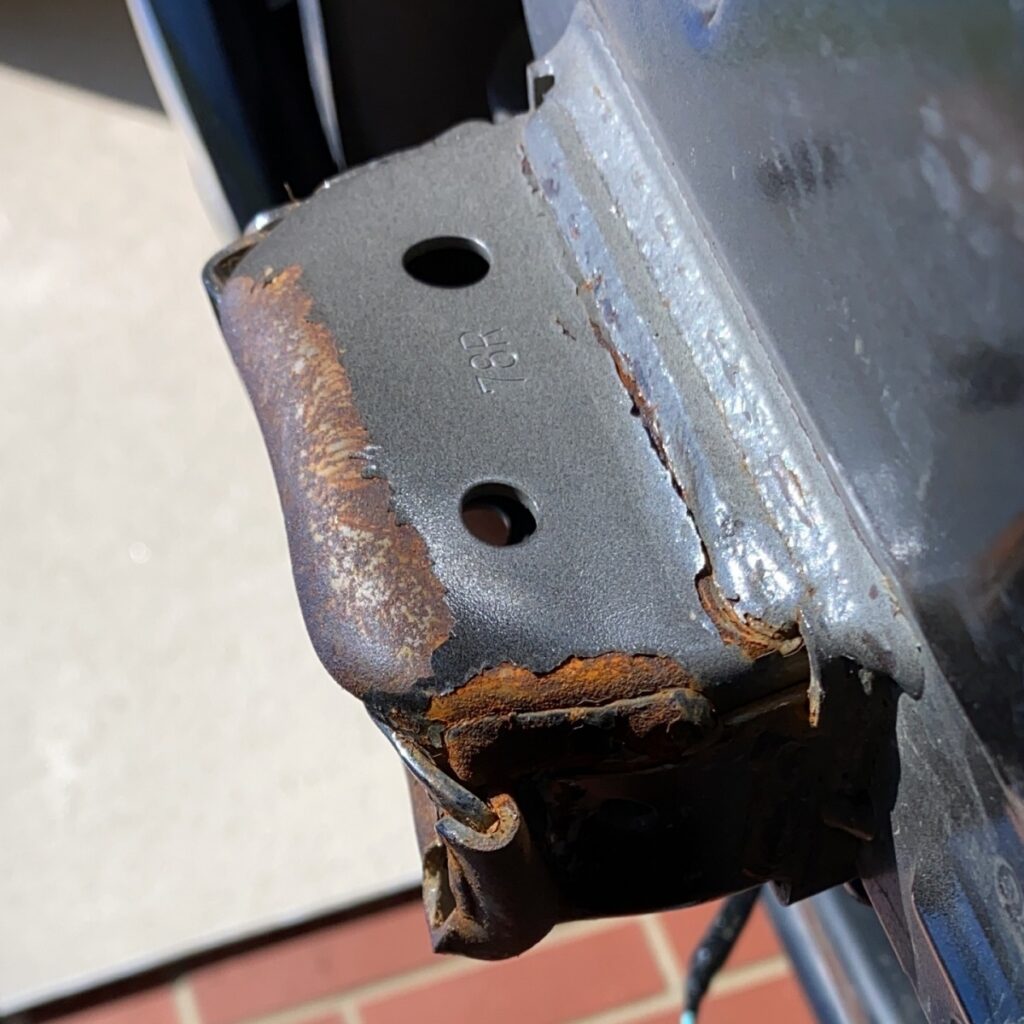
Plan B. The left hand side needed to be flat enough to allow for the 2 bolts of the bracket to slot through and sit flush. That’s a job for a big hammer. After some ‘careful‘ manipulation it started to fall into place. I sanded the rust off and then sprayed a few coats of black paint on the full crossmember and left it overnight.
Installing the bumper (cont.)
The fix wasn’t pretty but the skid plate will fit. It’s still bent out of shape on the bottom and right hand side. The left hand side was hammered flat enough to get the plate fitted. A right mess on but given the fact that replacing the crossmember means removing it from the chassis and welding it on, that would have been a pain in the ass to get done. The part is only £84 but out of interest my local Suzuki bodyshop didn’t really want the work, unless they were doing the whole job of fitting a stock bumper too.

There’s 2 M10 bolts that attach the skid plate to the crossmember. The translated instructions didn’t seem to mention anything about having to drill one of the holes larger (bottom ones) but that was needed to get them both to fit. After that it was super easy to bolt the skid plate on.

The instructions say to mount the skid plate first, I’m not certain why. It could be done in either order, unless I’m missing something?
Anyhow, the next step after fitting the skid plate is to cut the excess trim off the front of the wheel arch trim. I temporarily fixed the bumper on, marked the shape of the excess and fired up the trusty Dremel. After a few careful cuts it was ready.

It was time the push the bumper into place but before that I fitted the fog lights and ran the headlamp washer tubing across and connected them up.
The fog lights are a snug fit, in fact it was quite tricky to get them in. It’s the only part of the bumper I think they could have sized better. With the fog lights fitted and the bumper popped into place (you’ll hear it) I attached the 4 trim clips along the top and 1 of the the 2 screws that can be reattached under the wheel arches.
All that was left to do was to fix the 2 support brackets to either side of the bumper underneath. They help secure it to the same fixing point that the stock trim attaches too. I ended up using a 2 M6 nut and bolts as I couldn’t get the trim clips to go through the holes on the trim. No big deal.
Finally, there’s 2 little brackets to screw your number plate on but I opted for sticking the plate on with strong double sided foam tape.
And… we’re done!
Result
I’m absolutely buzzing with it! Love the look and it matches perfect with the grille mod. Perhaps not to everyone’s taste but I do like the Japanese styles more than the big chunky bull bar styles.

This ended up a fun project and one I’m really pleased I did myself. It’s not worth paying someone to fit it unless you really can’t be bothered. It would have taken me around 3-4 hours to fit if not for the delay from discovering the damage. Much quicker for someone experienced at this kind of thing.
I hope this has helped and feel free to comment if you have any questions. If I can answer them with any confidence and I’m not talking BS I will happily help ☺️.
Hi, i really like the car and website, very clean. I am curious to know what resources you used to make this site, is it pure html and css?
Thank you.
Thanks Chinedu, the website is a very basic WordPress template that I’ve modified.
Hallo , ich würde gern diese Stoßstange bestellen , wäre das möglich, sie ist sehr stimmig,
Liebe Grüße Jens
Hallo, mailen Sie Eiichi an enonwheels@gmail.com, um zu bestellen 🙂
Hi,
if by any chance do you know the measurement on the two L Shape support bracket to the bumper . I lost mine and was thinking of fabricating it or can I not do with the bracket at all. Im so devastated that I drop it while sending the bumper for a paint.. Any kind of help is very much appreciated ?
Hi Sam,
Sad to hear you damaged your bumper :/
Do you mean the silver angle brackets or the bigger ones that attach to the crossmember?
Hello there,
when you change the front bumper -as i experienced in my previous car-, there is too much wind noise blowing down.
Did you experince wind noise after the bumper is attached?
Hi, no I haven’t noticed additional wind noise with this bumper. ????
great to hear that! I searched google but no results for enon wheels. can you give me their ctc mail?
enonwheels@gmail.com but I think it’s cheaper getting it from Jimnystyle now https://jimnystyle.com/collections/bumpers. At the time I ordered they didn’t sell them.
Thanks. You are a legend!
???????? anytime mate
Your jimny looks nice and sleek. I’m currently building an older silver jimny into a mini on off road monster truck there isn’t going be one around our town like it. When I see you on the road al give you a beep
Your jimny looks nice and sleek do you plan to ad more mods in the future ? A good set of meaty tyres is a must to make any 4×4 stand out from the crowd. I’m currently building an older silver jimny into a mini on/off road monster truck there isn’t going be one around our town like it. When I see you on the road al give you a beep. yours was the first new shape one I have seen in town.
Hi Jamie, yeah the build will progress a fair bit over 2021 but nothing too dramatic. I do plan on adding 16″ wheels but I won’t be going for huge tyres, the max I’ll go is 225/70R16. Keeping the Jimny as lightweight as possible.
Hi part you mentioned at £84 do you need that to fit the skid plate or is it because you damaged if in the crash , keep up the good work ????
Hi Anthony, I managed to hammer it roughly close to the original shape which meant I could get the bash plate bolts through. The crossmember part was only £84 but it needs welding on to the chassis so it would have been expensive to replace. Not to mention the Suzuki bodyshop did not want to do the job until I was paying them for a new OEM front bumper plus the entire fitting.
Bumper looks neat in the jimny can you help me how to order from the philippines
Hi, there’s links and where to buy in the text in grey box ????
Hello Geordie
thanks for sharing your Jimny experiences!
I wanted to know how much you improved on Jimny´s stock approach angle of 37º by changing the front bumper?
Best regards
Hi Victor, I haven’t actually checked. I’ll try update the blog when I get some time to measure it for you.
Cheers
Paul