
THIS IS AN UPDATE TO THE ORIGINAL ARTCLE:
If you buy one of the lower priced roof tents they will generally come with an aluminium sliding ladder. You drill holes into the ladder to set the height of the locking pins that sets it to the height to your vehicle.
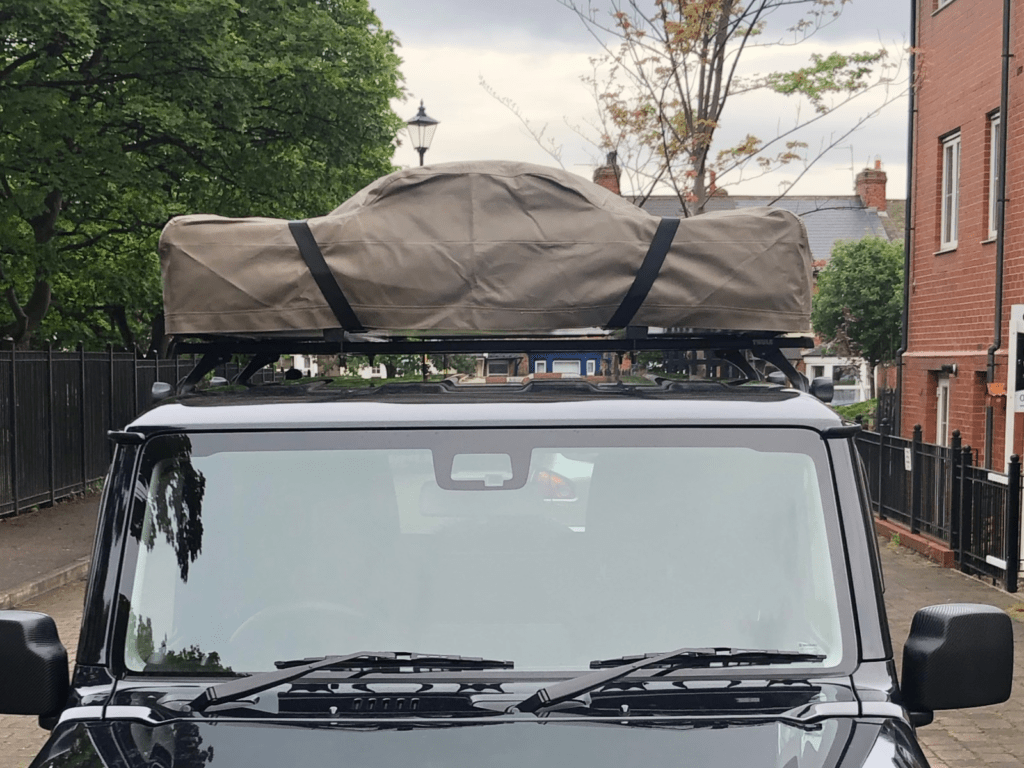
As you can see below, the height of the Jimny means the ladder has a 1/4 height step in the middle and they are quite narrow. Something wider with evenly placed rungs would be better.

Why change the ladder?
The Front Runner roof tent ladder adds 10cm of additional height and 4.6kg (10.4lbs) of roof weight when left attached to the tent when it’s packed away. You can see the height difference in the two pictures below.

If roof weight is something you care about, and you should owning a Jimny, then storing the ladder in the Jimny will help reduce the negative impact on the driving experience. That’s always a good thing, even if you have upgraded your suspension.
After driving and fuel economy tests I feel it’s worth the additional set up time of storing the ladder inside the vehicle. In reality we’d not bother changing it if not for the fact our intention was to store the ladder in the Jimny. I also made some modifications to the Front Runner roof tent cover driven by the need to reduce its height and weight (more to come on that soon).

The stock ladder fits in the rear of the Jimny if you decide not to do any modifications. My main reason for the modification is to save space. The Front Runner tent ladder requires careful manoeuvring into the rear of the Jimny and I ended up hitting the top brackets on the inner paintwork leaving a nasty scratch.
I wanted an easier method of reattaching the ladder at camp. Ideally with a more compact, wider and stable ladder.
Telescopic ladder
I searched online for days trying to find a proper roof tent telescopic ladder with mounting brackets. I could not find one for sale in the UK. Perhaps I’ve missed one and please comment below if you have any recommendations.
Roof tent telescopic ladders aren’t cheap either. Anything from $150-$250 is the price point I’ve found. Crazy! Normal 2.6m telescopic ladders on amazon start at £39 and after reading dozens of reviews we took a chance on the Nestling Aluminium Telescopic Ladder.

The ladder including the fixings weighs 7.4kg.
I’m sure there’s better ways to fix the mounts needed to the top of the ladder. I simply drilled 4 holes into the top of the ladder as shown below. Using gate/fencing brackets from a local hardware store and M6 nylock nut and bolts. Finishing them off with some black plastic bolt caps.

The hole in gate brackets (for the gate to swing on) is perfect for the quick release bracket I planned to use on the tent. The size is sufficient for an M10 bolt or rod.
Notice how the bracket is positioned the the back side of the ladder, with the black plastic sliders to the front. You you use them unlock the sections as you retract the ladder and need them facing you. Mounting the brackets in that way offers the pivot angle you need to reach the bolts on the tent and to be flush with the tent while packing away.
Quick release bolts
This part of the modification took some trial and error. My current method of using seat post quick release bolts works great but I knew I could make something better.
I was inspired by the spring loaded gates you see on public footpath gates and animal trailers. After a quick google I found the SMITH & LOCKE Animal Galvanised Bolt (150mm) on Screwfix.com. These looked promising.
They certainly felt super strong but the only problem to overcome was how to help support the end of the bolt when extended into the ladder brackets. That’s where all the weight bearing will be and the last thing I wanted was for the bolt to bend or even worse damage the tents aluminium framing.
The bolts would need some sort of custom bracket and a bunch of washers to allow it to sit flush against the tent as they’re wider than aluminium tent frame. The 2 bolt holes in the tent flooring is there for finishing and not strong enough to provide and support.
I decided to bash together make my own bracket to use under the bolt. After a few sketches I opted for the easiest design possible of a 40mm wide 2mm thick aluminium sheet with 4 holes drilled to fix under the bolt. The plate has a 90 degree bend at the end to help support the bolt end. The height is 25mm to allow for 1mm clearance of the bolt.

After a bunch of adjustments, success! The final brackets are almost half the height of the original ones and twice as heavy but it’s a marginal increase in weight.
Here’s a short video of the bolts in action.
The new bolts are a great addition providing the adjustable convenience and strength we need for the telescopic ladder. It means we can store the ladder much easier in the back of the Jimny and I’ve reduced my setup time by a minute or so… it all adds up!
I’m happy with this upgrade and I know my wife is thankful of the wider ladder which makes finding your footing a lot easier if you’re a bit nervous climbing down.
UPDATE:
I like to test stuff and experiment so bought a smaller 2m telescopic ladder.
It was really cheap at £34 so I’m not expecting it to be perfect. It’s a test to see if a smaller 2m ladder will work in practice. If it does I’ll try find a good quality one.

The 2m ladder is 2kg lighter than the 2.6m one and obviously has less rungs. This means the top 3 rungs don’t need tying down to stop them from expanding and the top step is full height, not half height as seen in the picture below.

It has the same weight bearing capacity as the 2.6m ladder of 150kg. There is more flex when climbing up so I might need to find a better quality one but I’ll give it a try for a few camps. Update: I’ve had no problems with the ladder and continue to use it.

Neither ladder has nicely angled steps, notice how they don’t sit flat while the ladder is angled correctly. However the 2m ladder extends each rung fully to the perfect angle, meaning no half steps to navigate.
Here’s how it stores in the Jimny in comparison to the 2.6m ladder.
2.6m Ladder

2m Ladder

The best place to store the ladder in my opinion is behind the drivers seat in the footwell. Meaning I can avoid it sitting on top of storage boxes or to the sides. It’s safer there during transit and more accessible to quickly retrieve or store it at camp by flicking the front seat forward.

Thanks, i would like to do a similar modification for my tent.
????????
Hello, how did it work so far with your telescopic ladder ? Hope it is not flexing too much as specs mention max load of 150kg in VERTICAL position, which is never the case.
Wonder what’s the quality difference (if any) with the FrontRunner one, except being twice the price.
Cheers
Nik
Still in lockdown mate so haven’t been able to try it. It does flex more than the 2.4m ladder I previously used in my initial try out at home. I’m sure it’ll hold up but known me I’ll buy a better quality 2m one later. I just wanted to see how low priced ones perform.
Looking at branded ones from tent manufacturers I would be extremely surprised if they were anything better than normal ladder suppliers. They’ve simply got proprietary hooks that work best with their tents or racks and inflate the prices on them.
Greetings and thanks for posting this information! I am on my 4th RTT and just ordered the Front Runner. I am not a huge fan of RTTs but the convenience when traveling with my GF is worth the weight.
I really appreciate the insight on the ladder, I dislike the one it comes with and was looking for a better solution. This is brilliant!
My first RTTwas a Chinese version of this and I replaced all the straps with MIL spec straps and buckles. I will also be doing the same for the Front Runner.
I also like the gym mat solution for the floor! I’m going to use that idea as well. I will be removing the Front Runner mattress and replace it with the Megamat Dual self inflating mattress.
Hoping that I can reduce the weight down to around 80 lbs or 35-40 kilos. The goal is to be able to deadlift the RTT and I’m almost 55!
Tossing it on a Lexus GX 460 (Prado 150) that is just under 7’ !
BTW love the Jimny! Wished we had them here in the USA. I’d by one for a work day truck!
Cheers! ????
Regards, Mike
Hi Mike, glad the post helped. You can definitely get the FR tent to 37.5kg with the ladder change. You might find this article useful too https://geordiejimny1.wpengine.com/suzuki-jimny-ultralight-roof-tent-set-up. I’ll be starting a project soon to try and get the tent to approx 30kg but not certain it’ll be a cost effective serious of modifications, more of a proof of concept project 🙂
Best wishes
Paul
Hey Mate! Love all your content it’s been such a huge source of info and inspiration for our Jimny.
Myself and my partner are about to start a trip around Australia with our little Jim and Front Runner RTT and have already completed a lot of your tent mods which have worked out amazing!
I would love to know what future weight saving mods for the RTT you have in mind? Obviously you don’t need to give too much away but some hits would be great haha ????
Hi Marc mate. Glad it helps!
Bet you guys are excited for your trip, lucky to have such an epic country to travel around. ????
RRT Plans include stripping it down and weighing each part then deciding if there’s a lower weight alternative. Materials such as carbon fibre etc so it’ll not be a cost effective series of mods, more of a challenge for me to see how light weight I can get this style of tent if I don’t get too concerned with the costs lol.
Thanks for sharing so much about your world of Jimny! Much like Marc ^^ I’m an aussie looking to travel around with my jimny, and my frontrunner RTT. I’m glad to find your page to learn about the abilities of this car, and modifications that can be done to increase the comfort and safety.
Cheers again!
Jess
You’re welcome Jess. It’s my pleasure to share it. Just glad it’s of some use to other Jimny owners ????
Have fun!
Thanks for sharing your process! I’ll also be replacing the Frontrunner ladder with your instructions, but what I’m asking myself is, how do you open the RTT without a ladder being attached to it?
Do you climb on the roof, mount the ladder, climb down again? 😛
Cheers, Moritz
https://youtu.be/JRTzWFERkz8?t=16s
Exactly right mate, demo video above 🙂
Where did folks get the gate/mounting bracket that attaches to the ladder. It’s a simple part, but for the life of me, I can’t find anything like this online or at my local hardware store. Anyone got a link?
Hi I used garden gate hardware but I don’t think it needs to be quite as strong as these. https://www.wickes.co.uk/Wickes-Metal-Driveway-Gate-Fitting-Kit—Black/p/194509
Most steel angle brackets should be fine.
Cheers
How is this holding up now?
It’s been no trouble at all. 🙂