
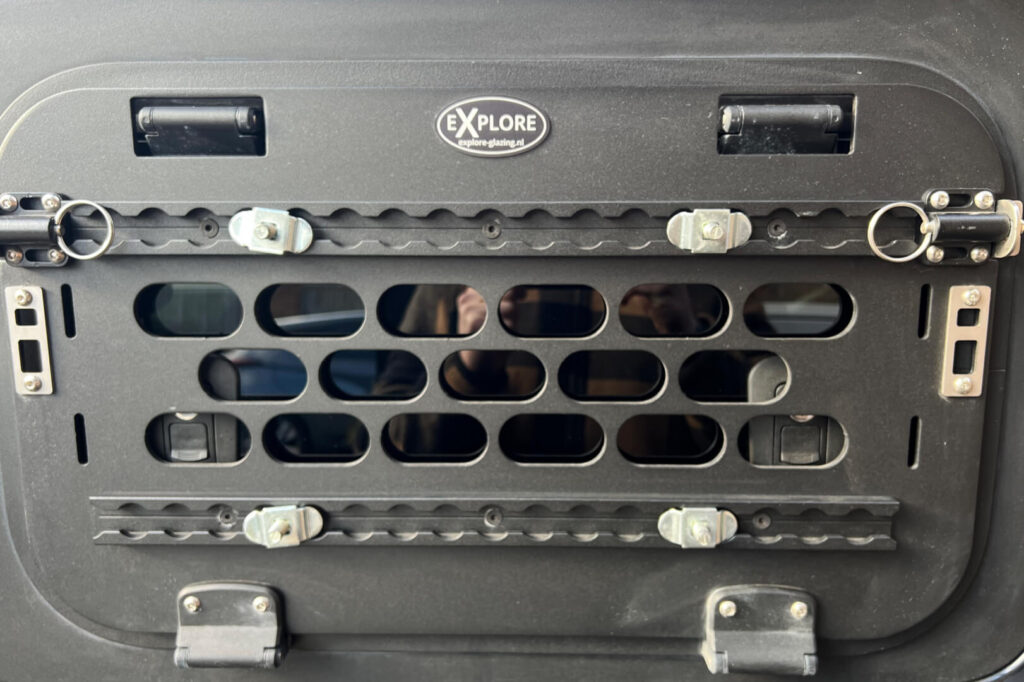
There’s a lot of things you might want to mount to the Explore Glazing Overlander window. It’s a small, versatile space and every Jimny owner knows any extra storage space is a valuable asset to exploit.
In this blog I’ll show how to mount a small storage box that has been modified into a coffee box.
It’s simple and quick to do. Here’s what I did.
Step 1:
Source the box you want.
I ordered a few boxes to test in various sizes that would suit my needs. Holding them up to the window to see what felt right and decided to go for a smaller box.
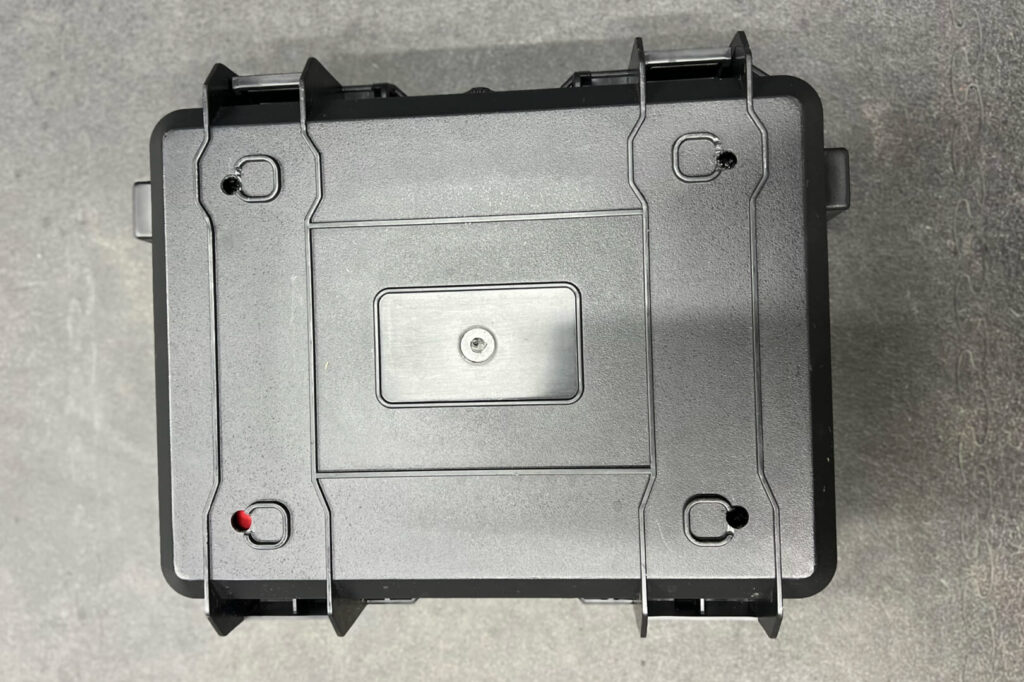
The size I ended up using is only L340mm x W270mm x D100mm.
Step 2:
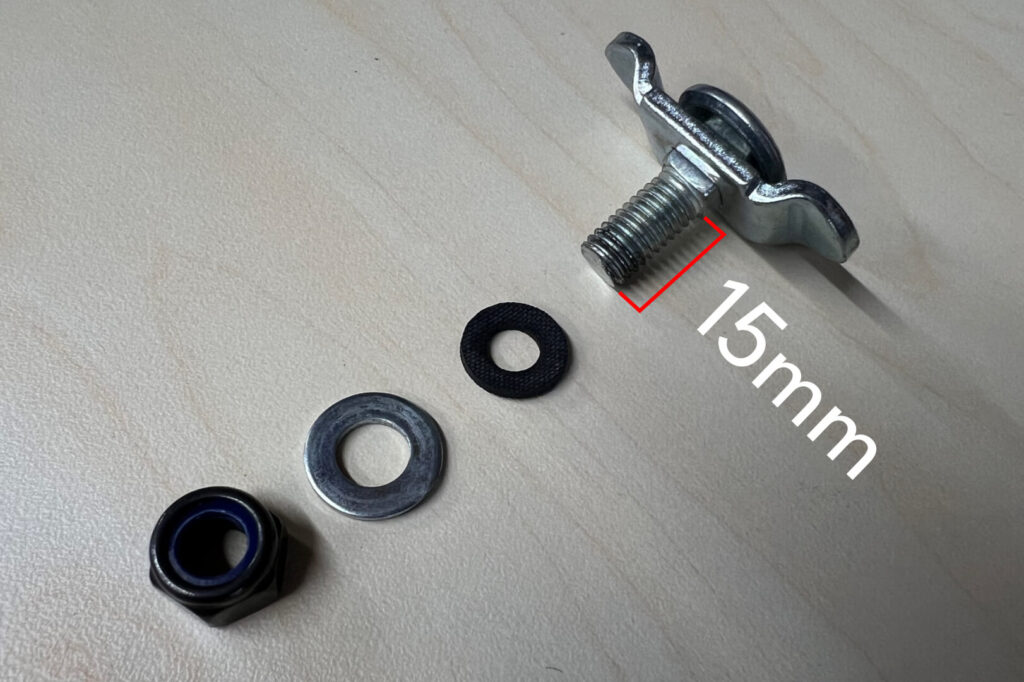
Buy short L-track double lug stud fixings or cut the longer bolts supplied by Explore Glazing in their Overlander kit.
You will need to account for the depth of your box to decide on the length you need.
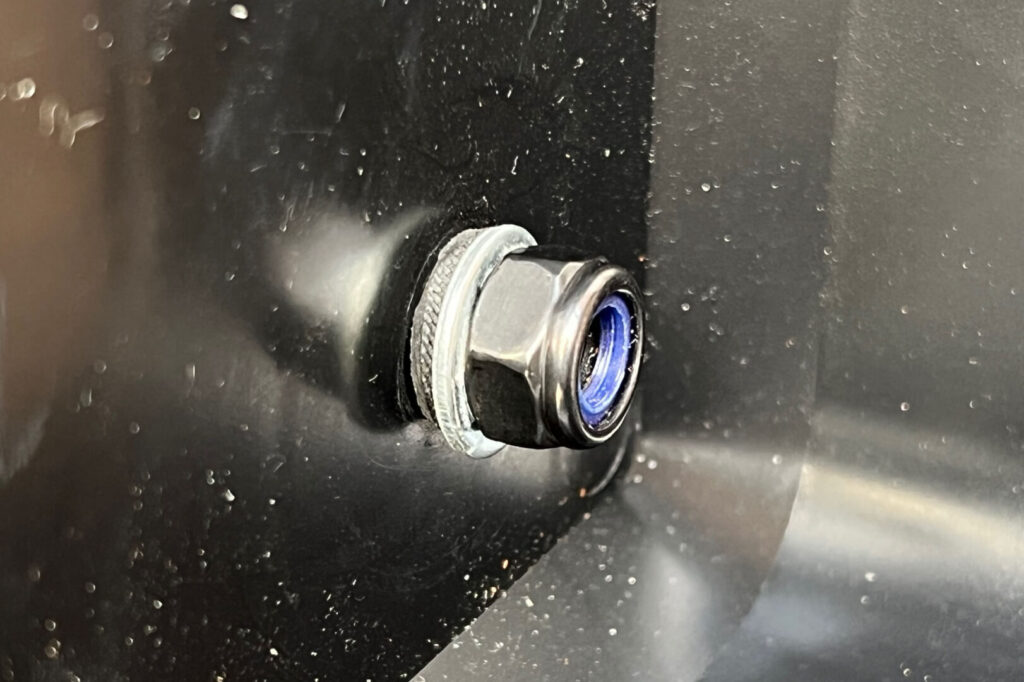
Mine ended up requiring a 15mm thread length to ensure the bolts were not protruding too far into the box. Just enough thread length to allow space for a rubber washer, stainless steel washer and locking nut.
Step 3:
Decide where you want to drill the holes into your box by lining up the bolts while they’re mounted in the L-Tracks.
Tighten some regular nuts on the threads to stop them from wiggling around while you mark the holes on your box.
Step 4:
Drill the correct size hole to match your bolt space pattern.
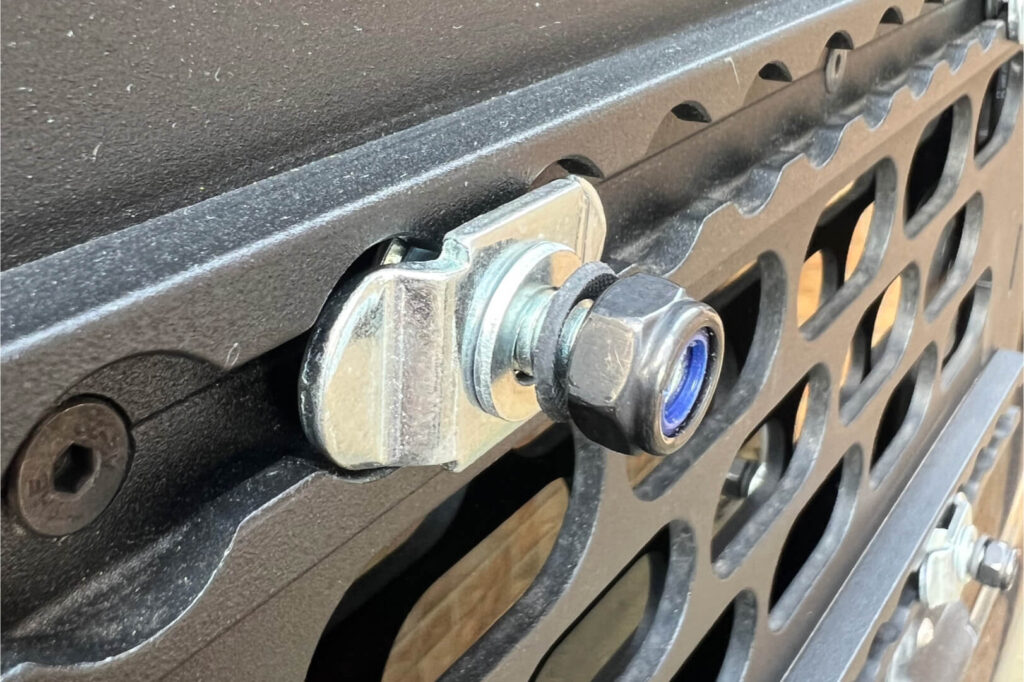
Then secure the box to the window using a rubber washer, normal washer and locking nut. The rubber washer has helped to avoid any water ingress.
That’s it, you’re done!
Here’s what I use my storage box for:
It’s no secret, decent coffee is a camping favourite so this Coffee Box serves me well.

